allora, come gia scritto da il fero, puoi farne a meno, anche per sempre, si potrebbe mettere all'antica con un pomello da tirare, senza l'obbligo che arrivi fino al manubrio il cavo...
per scaldare basta che dai un po' di giri di vite al minimo, poi smolli...
attento pero' che quel pezzettino, se avrai notato ha anche una molla, apposta che in rilascio sia chiuso, altrimenti cammini con aria spalancata...
per il discorso carburazione, stock è 138/142 se non ricordo male...
ti linko una discussione per chiarire un po'

" Default The Basics Of Jetting *This Expains It*
Pilot Screw - Idle
Pilot Jet - Idle to 1/4 throttle
Needle Jet and Jet needle - 1/4 to 3/4 throttle
Main Jet - 3/4 to full throttle
1) Idle Screw
Allow the engine to reach operating temperature. turn to smooth idle. If unable to obtain smooth idle, go to Step 2, Pilot Screw
2) Pilot Screw
If unable to obtain smooth idle: turn the pilot screw in all the way GENTLY until it bottoms, then turn the pilot screw 1/4 turn at a time until achieving a smooth idle. The pilot screw should be correct between 1- 2.5 turns. If idle is between 1-2.5 turns, the jump to step 4, Main Jet. If idle is NOT smooth between 1-2.5 turns, then jump to step 3, Pilot/ Slow jet.
3) Pilot/Slow Jet
If idle is not smooth with pilot screw between 1-2.5 turns, then the pilot/slow jet needs to be changed. There are 2 choices. either A or B
A - If the pilot screw has been turned more then 2.5 turns to smooth the idle, then install a bigger Pilot.
B - If the pilot screw has been turned less the 1 turn to reach smooth idle, then install a smaller Pilot.
Note! A larger pilot jet will eliminate the popping sound that may occur when letting off the throttle.
A larger will improve cold-weather starts.
4) Main Jet
Start with the richest (largest numbered) main jet and test at full throttle. the engine should "stumble" at wide open throttle (If engine does not stumble, then the engine is not rich enough and a larger main jet should be installed). Once you have a rich "stumble", install the next smaller jet one size at a time until full throttle results in normal operation. Once main jet step is complete, go back to step 2, Pilot Screw, and perform pilot screw adjustments one last time.
Note! If quad runs faster at 3/4 throttle then at Full throttle, then the jets are lean and a larger jet must be installed.
Needle
If carburetor has an adjustable needle, this step CAN be performed. If you have a slight hesitation but NOT a hard stumble between 1/4 -3/4 throttle, then the needle is probably lean. Raise the needle by lowering the clip.
Reading Spark Plugs
Once the main jet is set correctly by dropping a main jet size after the "stumble", confirm the jetting of the engine by reading the spark plug. This works best in top gear in a slight uphill area. After running at full throttle, do the following at the same time: pull in the clutch and stop the engine, DO NOT LET THE ENGINE IDLE! Remove the spark plug amd examine the color. It should be a Light Tan. If it is white, then the engine is running lean and a bigger Main Jet must be installed. If the color is Black, then the engine is running rich and a smaller Main Jet must be installed.
This is taken from the jetting sheet received when ordering from JetsRUs!
Decided to type this for anyone who needed it. Hope it helps!
Joe "
allora sulla carburazione bisogna andare cauti, ogni singola modifica va provata, altrimenti se cambi di colpo main jet/ pilot jet / la regolazione del PILOT FUEL SCREWS e alzi o abbassi il sieger degli spilli succede non capisci piu cosa va bene e cosa male...
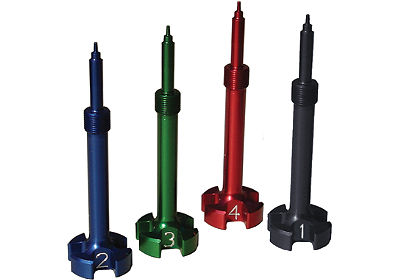
prima cosa come avrai notato, la regolazione del PILOT FUEL SCREWS purtroppo non si riesce a fare con i carburatori montati, e questa è una fregatura, in quanto è l'ultima regolazione da fare con il quad in moto e motore caldo, per ovviare al problema, ho acquistato questa coppia
se vuoi, ho a casa un kit dynojet con molle, spilli (hanno una tacca in piu per il sieger e sono piu sottili) e una decina di getti, mi sembra dal 148 al 165. tutto Mikuni ovviamente
Questo è un ottimo kit d'inizio, io ho solo acquistato in piu un getto da 170.
fammi sapere....
ciaoooooooooooooooooooooooooooo